We’ve all seen those old Western movies where the hero is crawling on the desert floor with an empty canteen and a parched throat. None of us want to experience that torture. It’s bad enough watching the bad acting. Same goes for heading to the backcountry for a weeklong wilderness experience. Nobody wants to be caught short of fresh drinking water.
Here’s where the do-it-yourself approach to human-powered outdoor recreation really comes in handy. The stove we built in Part One of this three-part DYI series, can be seen as an inexpensive alternative to a store-bought stove, and as a tool to help us understand how camping stoves work. Because the more we are familiar with the inner workings of equipment, the more likely we’ll be able to solve challenging issues with that stove.
It’s a given. Your gear will fail you.
That being said, the water filter we’re building today falls more into the understanding of how filtration systems work. Again, if we comprehend how our equipment works, we can better take care of that gear and repair it when it reaches a point of failure. And, if you have spent a considerable amount of time traveling in wild places, you know that your gear is eventually going to fail.
First off, there are three tried and true methods of water purification — boil, filter (purify), and chemical treatment. (For more on this, read Stay Sharp in The Offseason By Following the Way of the Farmer, available here on the NCOAE Blog.)
The industry standard when traveling with groups on guided trips in the backcountry is the use of chemical treatment, typically Iodine. That’s because Iodine is inexpensive, easy to carry, and highly reliable. Many outdoors enthusiasts use a commercially available filter, life straw, or gravity feed system. Not surprising, many don’t know how they work or how to repair them in the backcountry. This lack of knowledge has cut short many a trip due to a water filtration failure.
Once, while traveling in Nepal with a group of students from NCOAE, I was almost forced into building a water filtration system like the one we describe below. One of the participants swore he was having a reaction to the chemical treatment. And, because the mental perception of one individual can affect the entire group, when water quality is in question, we need to overcome that obstacle. My thought was to create a filter system that would not only educate the students but keep everyone safe — whether that danger was perceived or not. Fortunately, it never came to that.
So, what’s in your water filter?
Most filters contain a cartridge made up of synthetic, charcoal (carbon), porous materials like ceramic, that catches the nasty bits we can’t see and do not want in our drinking water.
The quick and dirty — by which we mean quick and clean — is that water passes through these materials at a slow enough rate that the little wee bits that make us sick get caught and don’t end up in our drinking water. Think N95 level respirators and surgical masks.
Knowing the parts and the process is going to help as we build our filter (synthetic cartridge).
Make a plan and follow through. Creating your own drawing or guide is important during the DIY process and can later serve as a blueprint for improvement and innovation.
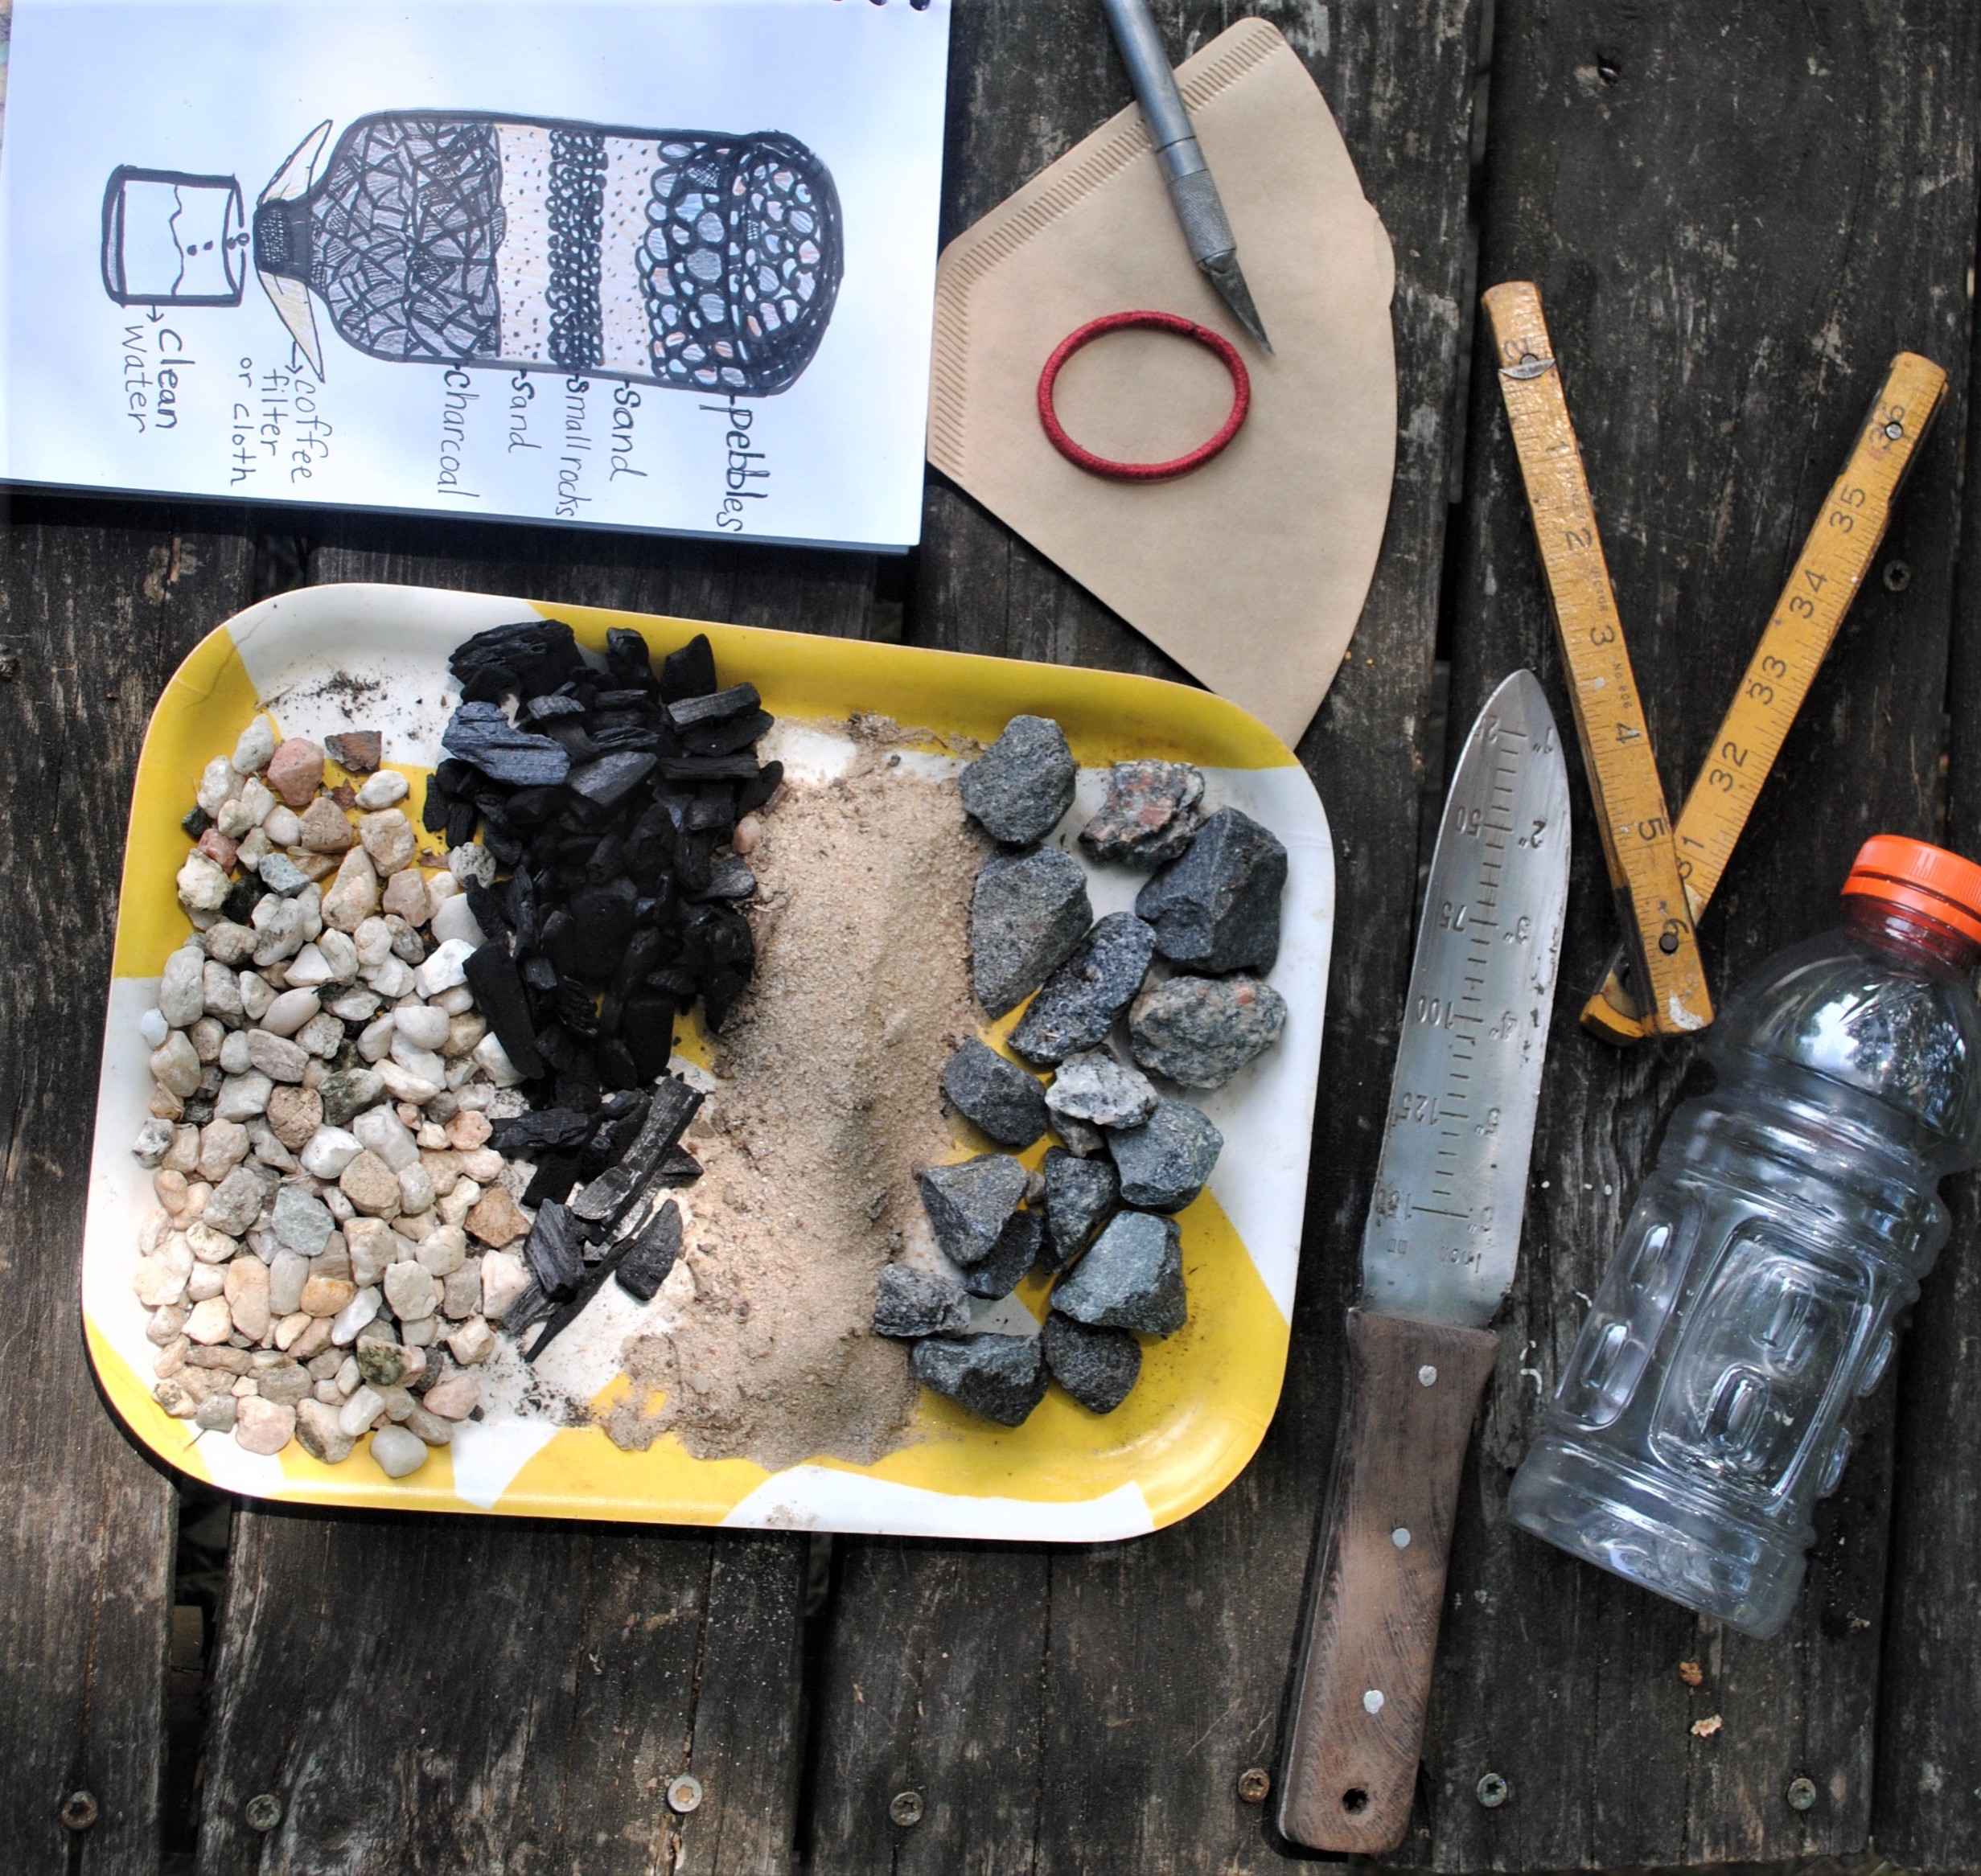
Below is a list containing the eight (8) materials you’ll need:
- Sand
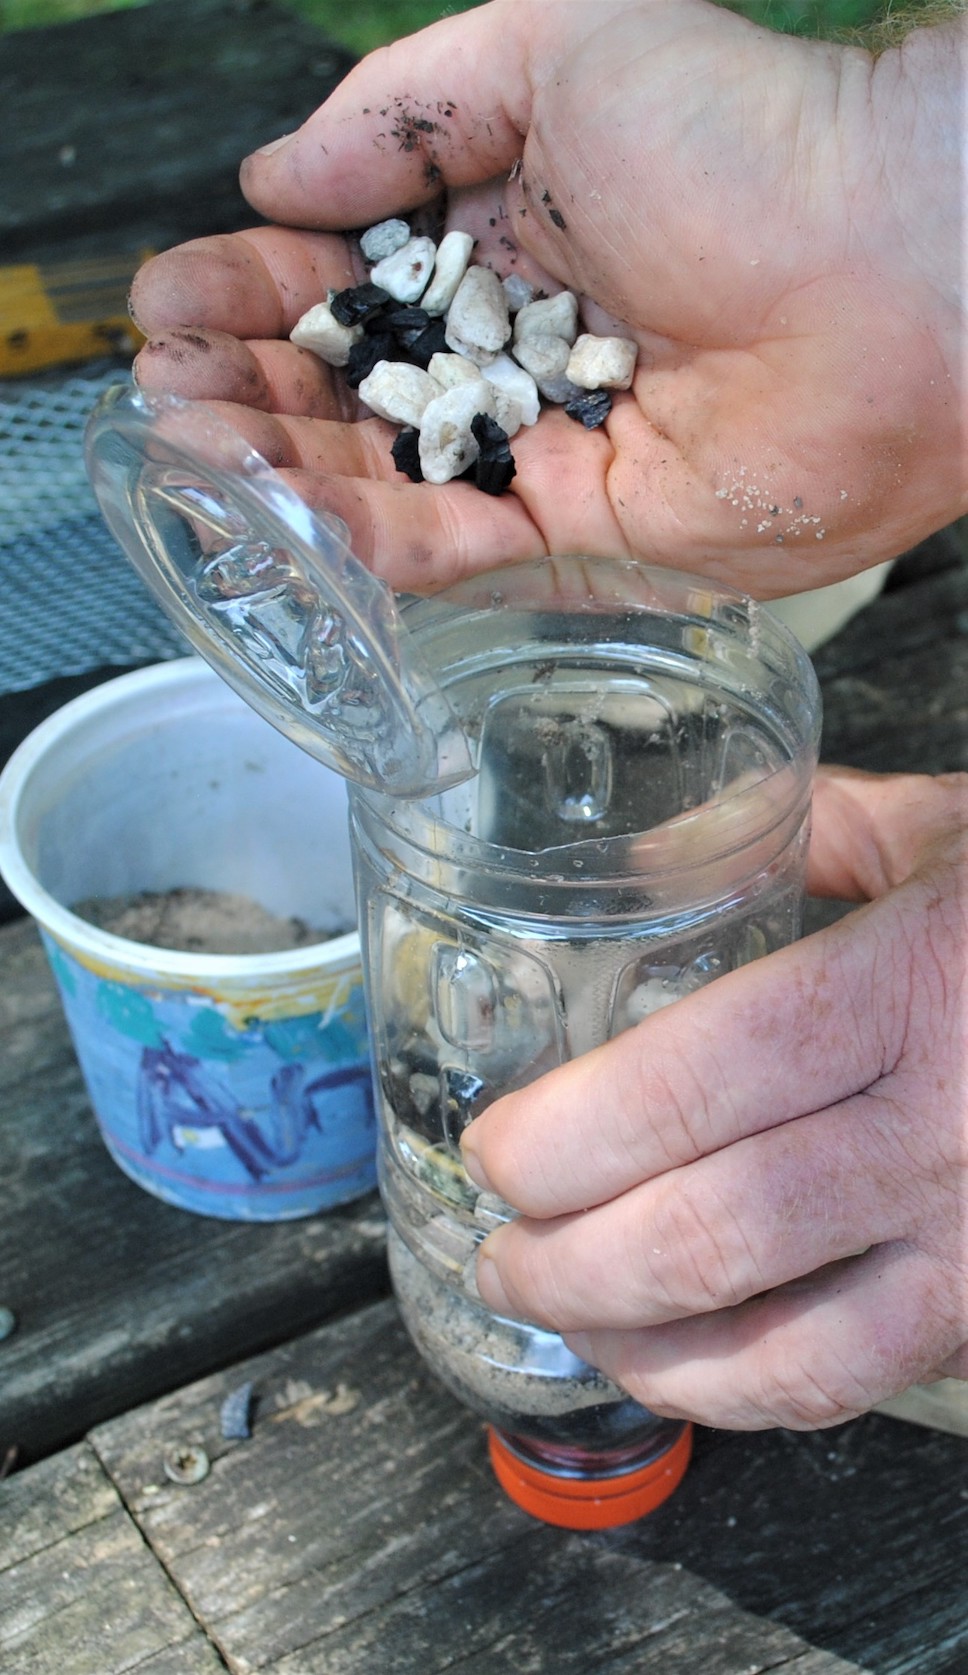
- Small pebbles
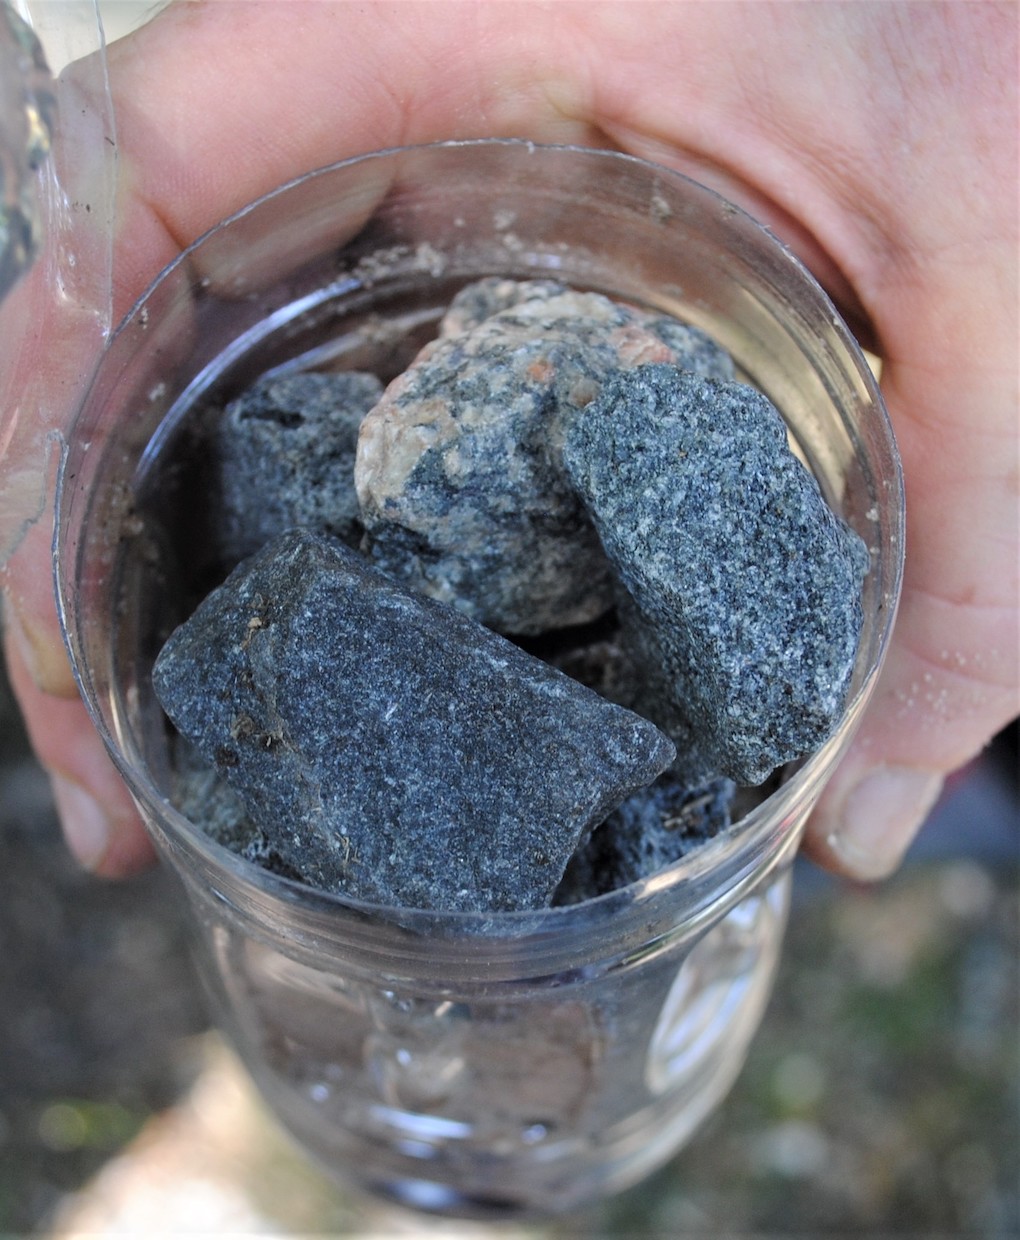
- Larger pebbles (rocks)
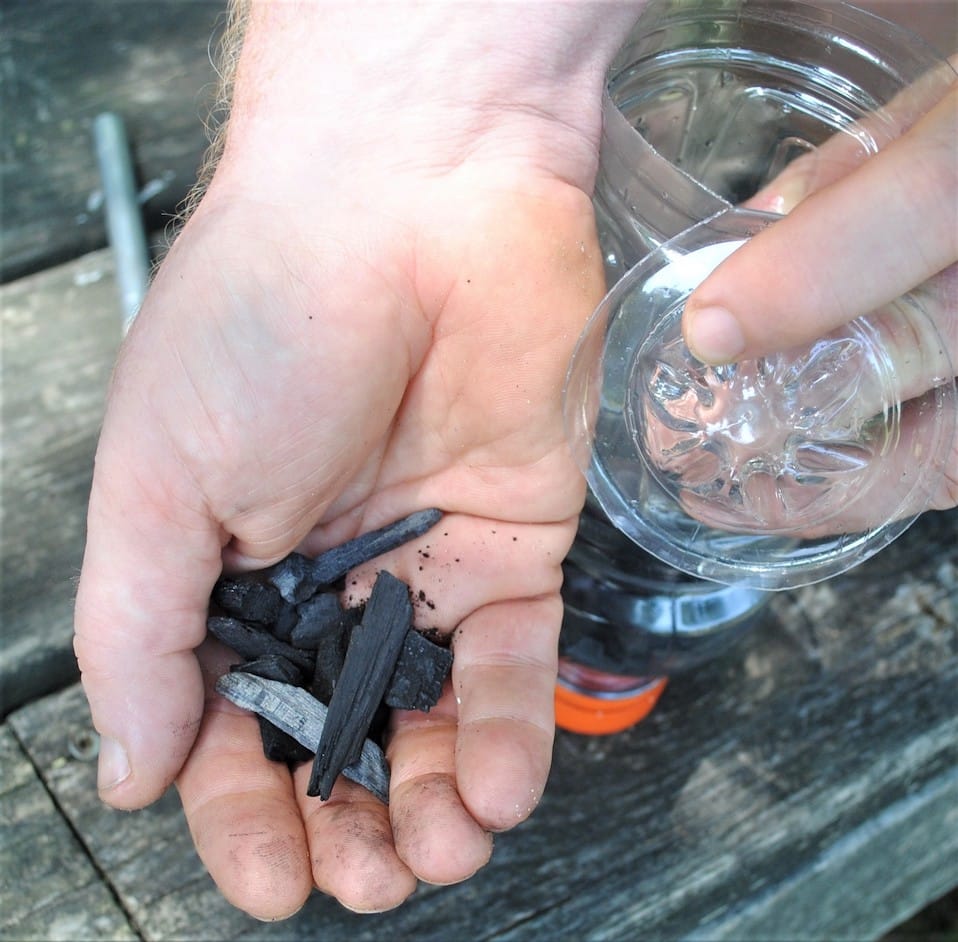
- Charcoal (carbon)
- X-ACTO knife or similar blade
- Water bottle
- Coffee filter or cloth
- Rubber band or hair tie
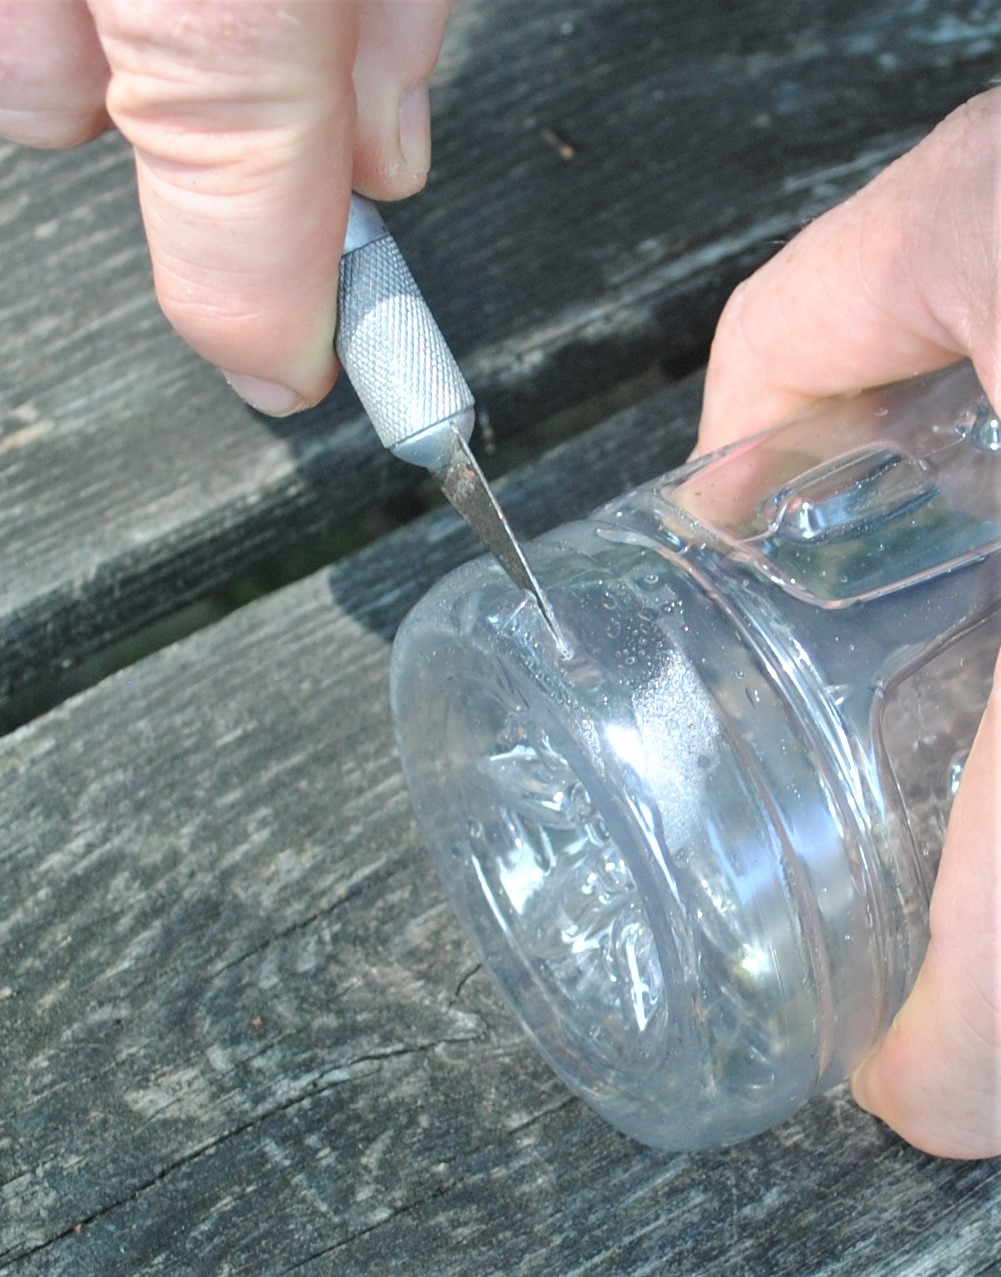
Step 1
Cut the bottom of the water bottle so there is an opening large enough to put in the materials. You might want to leave the bottom connected (like you see in the second image below). The connected top makes it easy to tape shut in case you need to travel with the filter for many days.
We also left the cap on, as you’ll see in some of images in other parts of this post, so material doesn’t spill out as we put the filter together.
Step 2
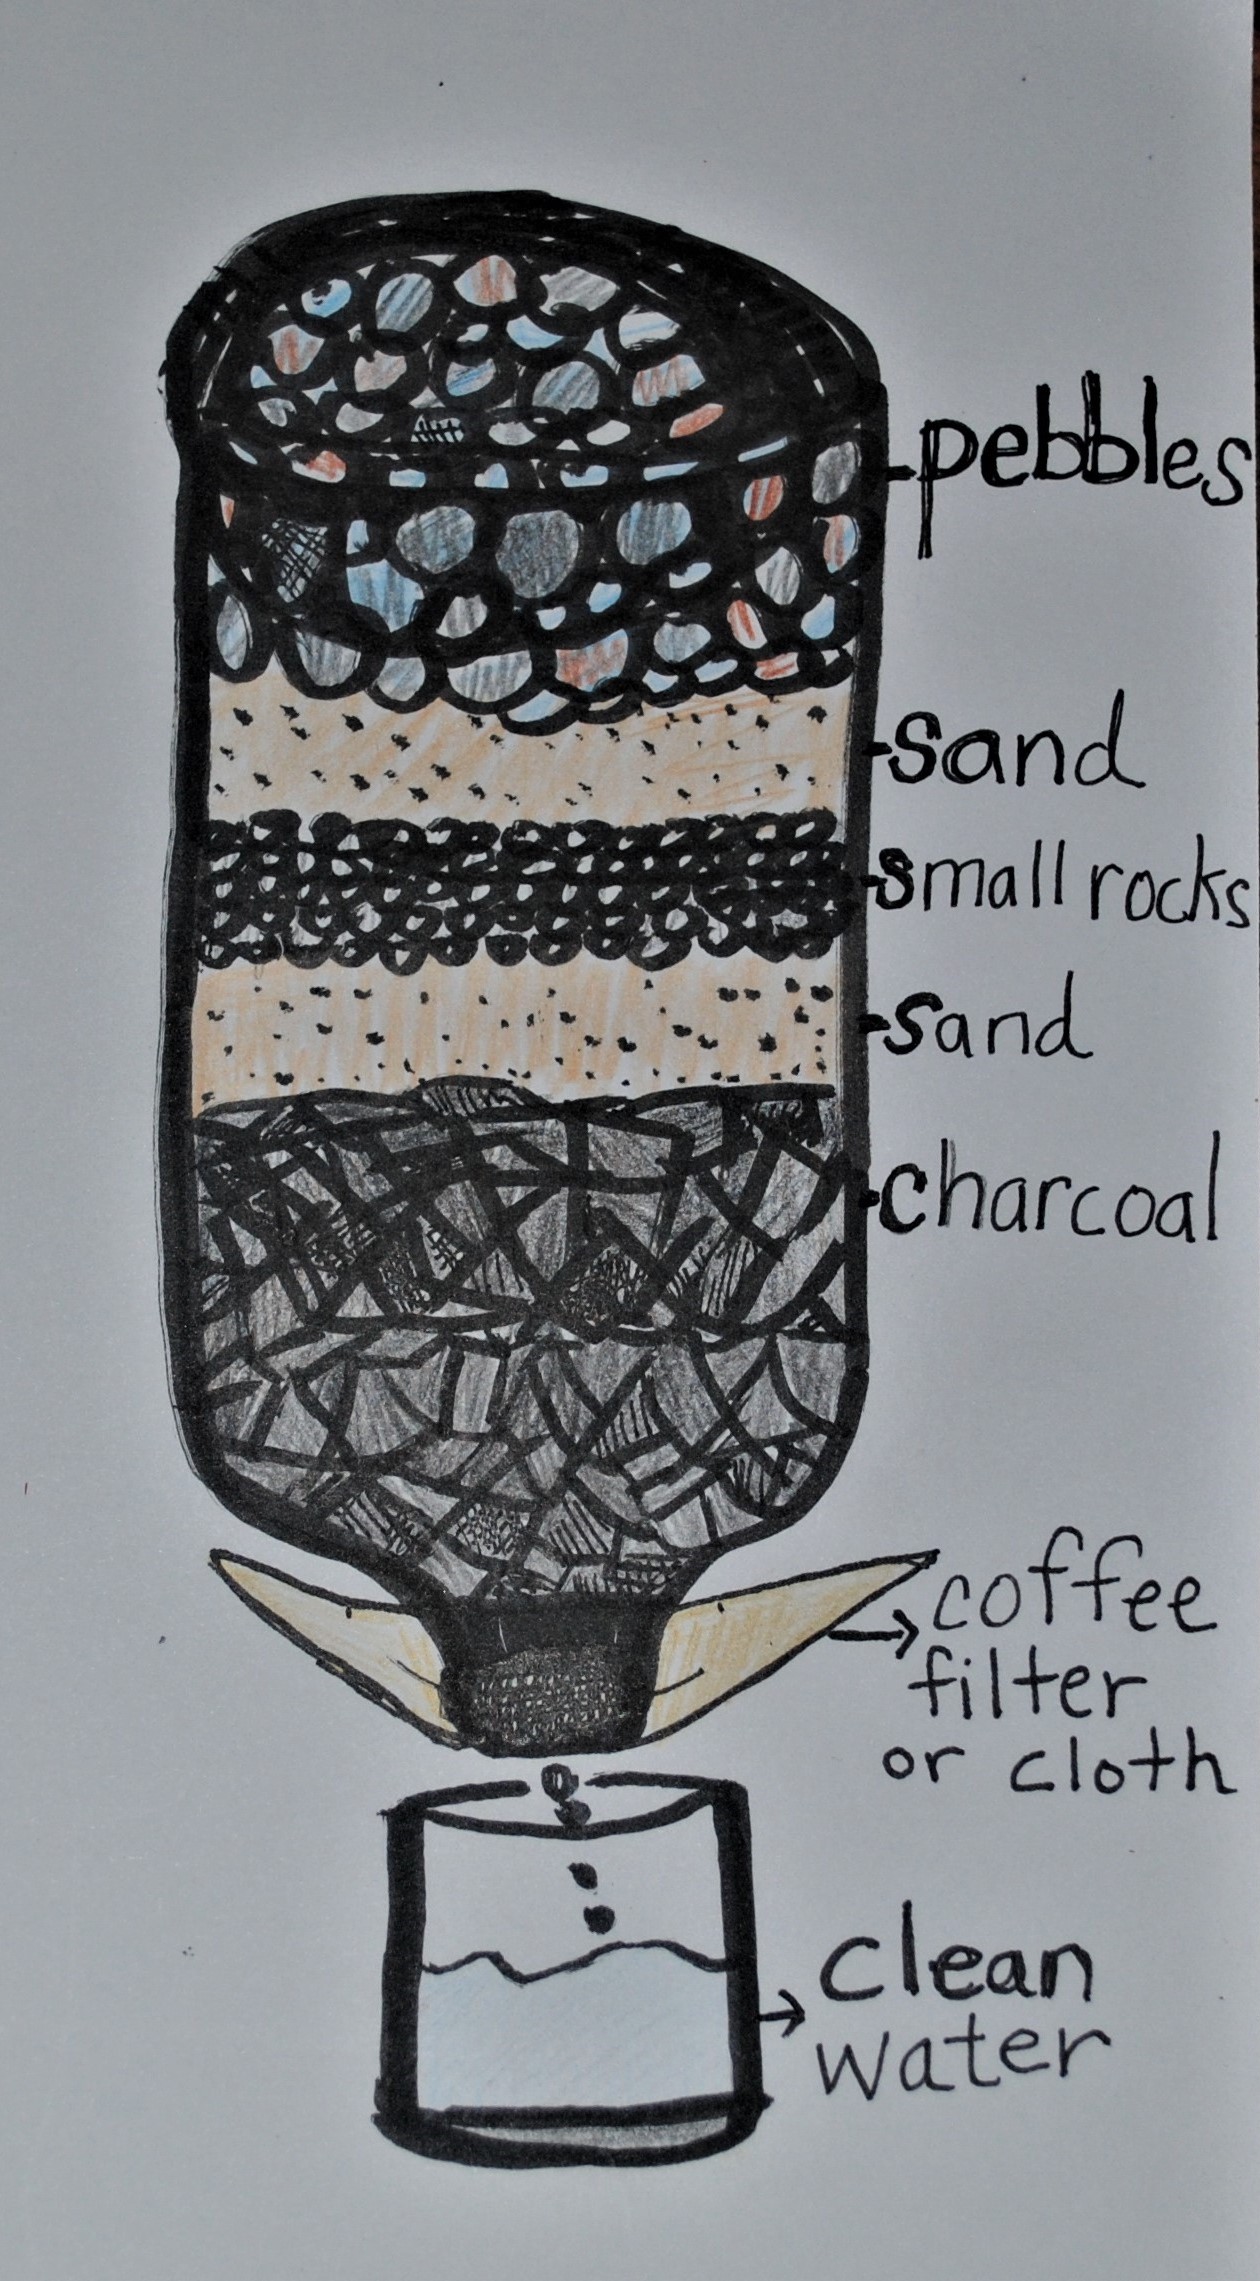
Fill the bottle with materials as shown below.
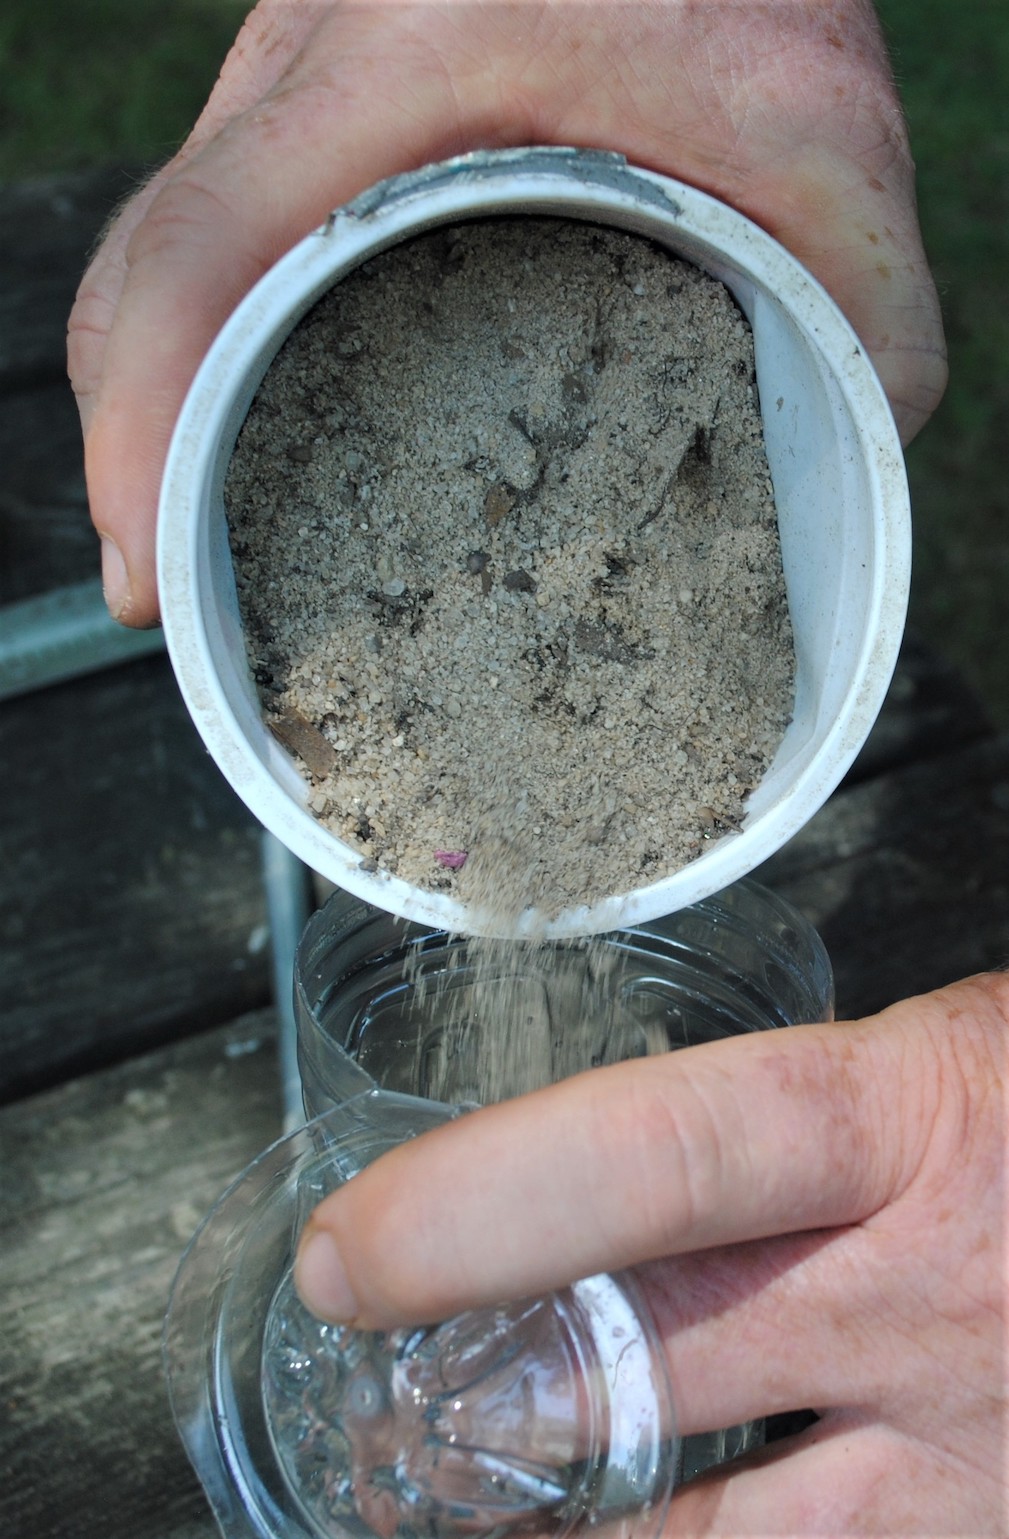
Each material level should take up 2-plus inches.
Charcoal goes in first, which means it the last material water will pass through when we turn the bottle around. Sand comes next, then small pebbles, some more sand, and finally, the larger pebbles.
Layers
See below for images of the layers we created.
Step 3
Hold the bottle sideways or close the bottom and hold the bottle upright, without spilling the materials. Remove the cap of the bottle and take a rubber band or hair tie and securely attach the coffee filter or cloth over the opening,
Pro Tip: You may find that some of your materials start to mix a little — especially the thin sand. If you want less mixing, cut a small piece of cloth or coffee filter and insert that material between the layers. This will not only slow the water passing through the filter, but it will offer better separation between materials.
Step 4
To test your filter, scoop up some murky water with a cup. You’re at home? Use weak ice tea or make colored water to pour through the system and observe the results.

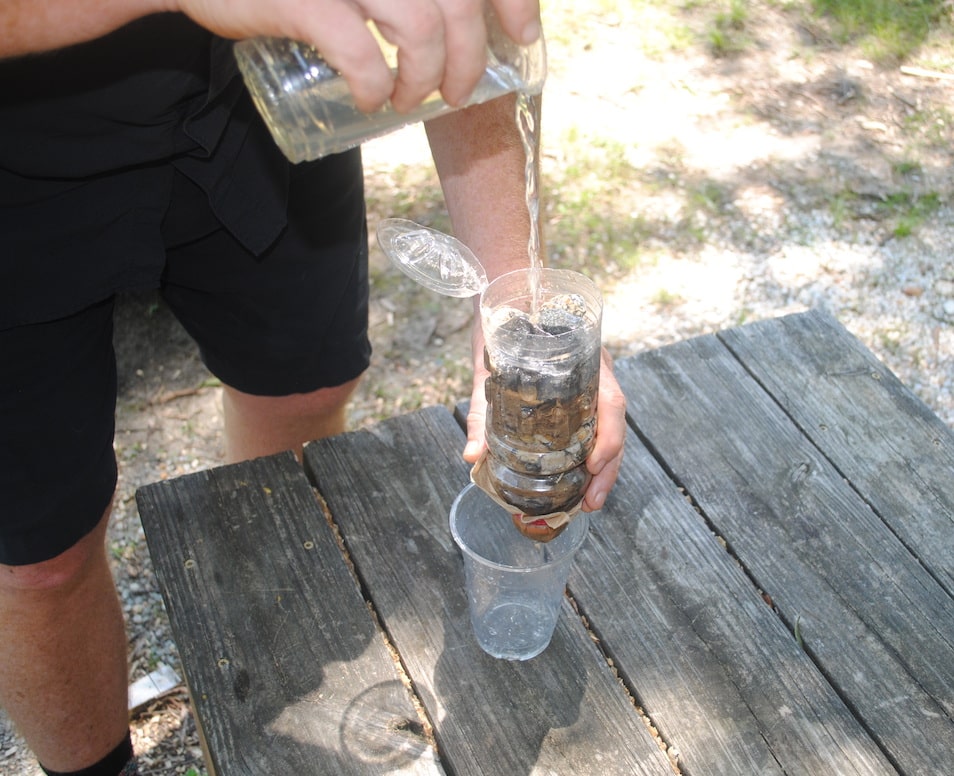

Don’t feel compelled to drink this water. Unless there is a bet involved. Here’s why. When we filtered our water for these photos, we ran the water through the system three times. Even with commercially available products, I have run water through several times when I think the environment surrounding the water supply has questionable quality.
We hope that by going through this process, we have helped you gain a deeper understanding of how a water filtration system works. It is with deeper understanding of our equipment that we gain confidence. And with confidence, we can travel further off the beaten path, to the wild places we have always dreamed we could go to using human-powered outdoor recreation tools like our own two feet or a Hippocampe All-Terrain High Performance wheelchair.
TALK TO US
Have any further questions about our courses, what you’ll learn, or what else to expect? Contact us, we’re here to help!
Leave a comment