During our latest Instructor Candidate (IC) course, I had the opportunity to witness one of the most beautiful shifts in group dynamics I’ve seen in a long, long time.
Our instructor candidates had just finished two days of challenging climbs — made all the more difficult by torrential rains, equipment challenges and late — very, very late — dinners. Empty bellies, low energy levels and mercurial weather makes for some pretty unhappy people.
On the third day we set off on even steeper climbs and larger elevation gains. By lunchtime, the entire group was getting the “hangries.” After the noontime meal, one of the instructor candidates (Jessica) said we needed to get a head start on dinner. Now.
And before we know it, she began leading us all through a dough-making lesson. As we began kneading the dough, everyone began chatting about a range of topics, with a little laughter and horseplay thrown in. What we were not talking about was smelly wet clothes, tired legs and aching bodies.
As we set off for our second half of the day, each of us had a ziplocked bag of rising dough tucked into our shirts, giving us the appearance of a large group of big-bellied backcountry enthusiasts.
By the time we found a suitable campsite, we were exhausted, the water was further away than we thought and a lot of work faced us before we could eat. You could slice the tension in the air with a pizza cutter — which was ironic because pizza was on the menu.
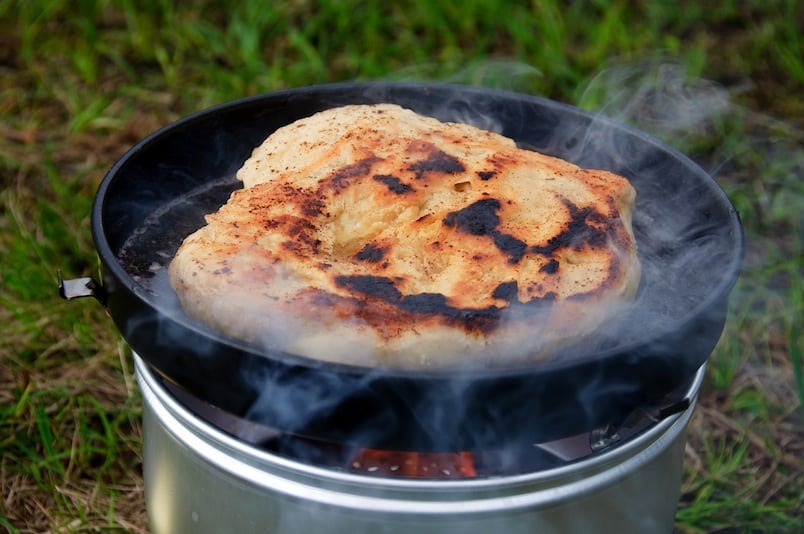
Everyone gathered around and extracted the risen dough from beneath various layers of clothing and began tossing it in the air. We planned for toppings and the kitchen started to hum with activity. Pizzas were being cooked in the Fry-Bake and the smells of fresh dough led to anticipation for what was coming.
The light from the stoves illuminated the scene, giving our campsite the appearance of a pizzeria in the woods, with dough flying, cooks yelling instructions to each other, and an efficient assembly line forming in order to get orders out.
The pizzas were amazing, attitudes were shifted, and the meal became a highlight and a turning point of the trip.
Cooking is a major ingredient in a successful wilderness trip and our backcountry gourmet here at The National Center for Outdoor & Adventure Education (NCOAE) is course director Matt Seats, who constantly emphasizes the importance of having the tools you need to create cognitive shifts that start in the belly.
I have been fortunate enough to travel with Matt, and I’ve have tasted the magic he whips up in the backcountry.
Here’s Matt’s description of what it takes to become a backcountry gourmet:
Anyone who has ever planned or participated in a backcountry trip that lasted more than a few days knows that carrying every bit of the food you will eat during your entire trip — on your back — can be a enormous burden.
Some try to reduce that weight by substituting things like ramen noodles for everything. Others carry only high fat items like cheese and sausage. Still others make do by living off of protein bars for days or weeks on end. Sure, you can fuel your body by doing those things, but why in the world would you want to?
I can’t imagine using any of those food choices without experiencing major food stress. Good nutrition — a balance of proteins, fats, and carbohydrates — is a critical element of successful backcountry travel. Good-tasting nutrition can make the difference between just fueling your body or looking forward to every meal. I look forward to tasty, nutritious meals that are as satisfying an experience as my treks in the wilderness are.
What follows are four tips and recipes Matt says can increase your enjoyment of mealtime on the trail. Keep in mind, we’re usually cooking for a group, so you’ll need to scale the recipes below up or down to suit your needs. We hope you find them useful.
TIPS
Tip 1. Carry a selection of seasonings; spices, add-ons, and sauces that are heavy on flavor and don’t take up much space or add much weight, to your pack.
Some of Matt’s favorite trail staples include:
- Curry powder
- Powdered coconut milk
- Crushed red pepper flakes, or cayenne powder
- Hot sauce
- Cumin
- Chili powder
- Dried cilantro
- Dried basil
- Cinnamon
- Garlic powder, or fresh garlic
- Sesame oil
- Olive oil
- Corn oil
- Soy sauce
- Fresh ginger root
- A tube of tomato paste, or tomato powder
- Parmesan cheese
- Dry roasted peanuts or almonds
- Peanut or almond butter
- Balsamic vinegar
- Brown sugar
- Dehydrated (not freeze dried) vegetables
- Bouillon
- Butter flakes (dehydrated butter)
- Dried soup mixes
- Liquid smoke
- Cracked peppercorns
- Sea salt
- Sazón packets
- Honey
- Dehydrated shrimp
- Smoked salmon packets
- Sauce packets (spaghetti sauce, pesto, alfredo, etc.)
- Salsa (but use it all up on the first day)
- “Squeezable margarine,” like Parkay
Tip 2. Opt for the fastest-cooking varieties of your favorite options, but not those “instant” varieties that don’t have the same texture or flavor. Examples include:
- Angel hair pasta, instead of spaghetti elbow noodles
- Quick-cooking rolled oats
- Quick-cooking grits
- Parboiled rices (brown, wild, basmati, mixed blends)
- Quick-cooking Quinoa
- Quick-cooking Bulgur
- Quick-cooking Couscous
- Dehydrated (not freeze dried) beans and/or refried beans
- Applewood smoked bacon instant potatoes
Tip 3. Take a few “luxury items” with you. For example:
- Hard cheese(s) – Like extra sharp cheddar, pepper jack, Swiss, or smoked Gouda
- Sausages – Like pepperoni, high quality summer sausage, salami, etc.
- Dark chocolate chips or bar
- Dehydrated (not freeze dried) fruits – Like craisins, raisins, apricots, blueberries
- Fresh carrots or other root vegetables
- Fresh onion
- A sweet potato
- A red pepper, or dehydrated red pepper flakes
- Your favorite tea, coffee, or hot chocolate
- A plastic squeezable container of jelly
Tip 4. Have at least one unexpected, from-scratch, amazing feat of cooking planned for your trip. Everyone’s favorites include pizza, empanadas, and cinnamon rolls.
RECIPES
Empanadas
Serves: 8-12
These Latin, Southwestern, or Asian stuffed fried pastries can be filled with anything that tastes good, like very thick stew, seasoned rice, beans, and cheese, meat, or even jelly!
Ingredients for the dough:
- 2 cups of Masa harina corn flour (made from ground, dried hominy)
- 1-¼ cups of warm (treated) water (amount may vary depending on air humidity and other weather conditions).
- 1/4 teaspoon salt
- 2 pieces of round plastic cut out from a bag. (A 1-gallon Ziploc bag cut into two pieces is ideal for this purpose).
- About 1 1/2 cup of vegetable oil for frying.
Ingredients for the filling:
- 6 cups of filling (cooked chicken, rice, beans, grated cheese, or whatever you have on hand that’s already cooked). Note: Filling should be cold, or cooled, to keep the dough in shape.
Directions:
- Prepare the dough in a bowl, mixing the masa harina, salt and warm water to form a ball. Knead dough until smooth. Divide the dough in 12 balls, and flatten and slightly cover with plastic wrap. Set aside.
- Place one ball of dough between two pieces of plastic and press into a flat, round disk about 1/8-inch thick.
- Remove the top piece of plastic and spoon some of the stuffing onto the tortilla, leaving enough room to seal the edges.
- Using the piece of plastic fold the dough over to make a half-moon shaped turnover. Pinch the edges, making sure they seal to avoid any leaking of the mixture while frying. I use the tines of a fork to pinch the edges.
- Remove the empanada from the plastic and set aside. Keep working with the rest of the dough and forming the empanadas.
- Heat the oil in a skillet over medium heat. If it smokes, turn it down.
- Deep fry the empanadas one or two at a time until golden brown, about 2 minutes on each side. The oil should bubble when you lower it into the oil. If not, it’s not hot enough.
- Drain the browned empanadas on paper towels or a paper plate. Serve them hot, topped with salsa.
Pizza, Calzone, or Stromboli
Serves: 10
Ingredients:
- 10 cups of flour, divided into 10 one cup portions; one per person
- 10 packets of yeast
- Olive oil and a 1-gallon Ziploc bag
- 2 cups TVP or dehydrated vegetables, or 2 packs chicken
- 2-3 tubes tomato paste
- 1 to 2 cups of brown sugar or honey
- 4 teaspoons garlic powder, or any other spices you want to add
- 4 pounds shredded or sliced cheese
- Sliced sausage or pepperoni
- Hot sauce
- 10 cups treated water
- 5 spaghetti or pizza sauce packets
- Any other toppings you have on hand
Directions:
- Heat treated water until it’s hot — but not too hot to touch. Pour 1/2 cup into each person’s clean Nalgene bowl
- Add a tablespoon of honey or brown sugar to each bowl and stir to dissolve
- Add a packet of yeast to each bowl, stir gently to dissolve, and place out of direct sunlight, covered loosely, and leave it alone. In about 15 minutes, remove the lid and look at your mix. It should look foamy and bubbly
- While you wait for your yeast to work, you can prepare your toppings (if you’ll be eating in the next hour or two). Otherwise, take a break until your yeast water gets busy.
- When your mix has been frothing for a few minutes, slowly add flour and any spices you like in your dough (oregano, basil, garlic, but no salt) to your yeast water, mixing it with your (washed and clean) hands until your dough ball is not sticky and is between the size of a baseball and a softball.
- Place about a teaspoon of oil in your Ziploc bag, leave a lot of air space in the bag, place the dough ball in the bag and zip it closed.
- Place it in a warm (not hot) place, with no drafts (out of the wind) and let it rise until it’s double or more its original size — an hour or more.
- Once dough is ready, dust it with a little flour if its sticky, divide it into 4 equal pieces, put some flour on cutting board to roll 3 pieces into circles to fit the Fry Bake. You can roll out all four pieces, but it’s more fun to save everybody’s fourth piece for tomorrow morning’s cinnamon rolls!
- For pizzas, leave the dough pizza-dough-thick. For calzones or strombolis, (inside out pizzas), roll the crust very thin for calzones, or leave it pizza-crust-thick for strombolis.
- Line up everybody’s crusts and have all toppings handy — the cooking process starts moving very quickly when the first pie hits the pan.
- Preheat the FryBake (or FryBakes if you’re using multiple stoves) over a medium-low flame with a drizzle of oil in the pan. If it smokes, it’s too hot.
- Have toppings ready, and place one pizza or calzone crust in the heated pan while it’s on the stove.
- For pizzas, brown the first side (about 1-3 minutes) and flip the crust over. Quickly top with sauce, cheese, and whatever else you’re putting on top. If the crust is cooking too fast, remove from heat and turn the flame down.
- Sprinkle a tablespoon or two of water under the crust, put the lid on, and steam the toppings to cook and melt them all together. Place cooked pizza on cutting board when everything’s melted and before crust gets burned (keep heat low).
- For calzones or stromboli, When the first side hits the pan, quickly top ½ of the crust with sauce, cheese, and whatever else you’re putting in it. Wet the edge of the crust with a little water, fold the crust in half and carefully (to avoid burnt fingers) pinch the edges down together with a knife handle or the back edge of a spoon.
- Place a tablespoon or two of water in the pan, making sure it gets under the crust. Cook for 2 minutes with the lid on to melt and heat everything. If the crust is cooking too fast, remove from heat and turn the flame down.
- Place cooked calzone or stromboli on cutting board when everything’s melted and before crust gets burned (keep heat low).
- That’s it! Cut ’em up, hand ’em out, and enjoy the best meal you ever for yourself! Oh yeah, save all that extra dough for tomorrow’s cinnamon roll breakfast in a clean Ziploc.
Cinnamon Rolls
Serves: 10
Ingredients:
- All of the leftover dough from pizza night (see above)
- 1 cup brown sugar
- 1 cup raisins
- 1 cup chopped walnuts (or other nuts)
- At least 1 cup butter or “squeeze butter”
- Cinnamon
- Dental floss or a very sharp knife
Directions:
- Oil the inside of your skillet.
- Squeeze all the dough scraps together and roll it out ¼” thick into one or more 18” X 18” sheets of dough.
- Spread butter on one side of the sheets of dough
- Sprinkle the buttered side of the dough with cinnamon, brown sugar, a few chopped nuts, and some raisins
- Roll the sheet into a tightly rolled tube shape
- Using a foot-long piece of the dental floss wrapped around the first finger of each hand, or a knife (much more difficult to keep from destroying the rolls), cut across the roll every ¾”-1” (about the thickness of your thumb) to form pinwheels
- Over low heat, preheat skillet. If it smokes, it’s too hot – turn it down and let it cool off until a drop of water just barely “dances” in the pan
- When the pan’s preheated, put a pat of butter in the pan to melt it, and then fill pan with pinwheels touching each other
- Sprinkle the tops lightly very lightly with a little more brown sugar, raisins, nuts, and cinnamon
- When the edges of the pinwheels start to brown and butter is bubbling up between them, pour a couple of tablespoons of water in the pan and cover it to steam and bake the rolls for about two minutes. Then flip them to brown the other side. Add a little butter to the pan if needed to reduce sticking.
- When the edges of the second side start to brown, remove the roll and add a new one to keep the process moving. If the pan is getting too dry, add some butter and a tablespoon of water.
- The dough will bake and brown, but the whole mess of brown sugar and butter and nuts and raisins will caramelize and get sticky and hard and gooey and so-o-o-o-o-o good!
- Scrape the pan as often as things start to stick to the pan, don’t let anything burn (keep the heat low enough) and when in doubt, add more butter, and sugar and spices and toppings to the pan.
- Serve hot, and get ready for the compliments!
- Cleaning TIP – As soon as the last roll comes out of the pan, fill pan with water.
– – – – – – – – –
About the Authors: Stephen Mullaney is the staff development director at The National Center for Outdoor & Adventure Education (NCOAE) in Wilmington, N.C., where he is responsible for the training and education of NCOAE’s field instructors. He is a member of the North Carolina Association of Educators (NCAE) and has taught within the Durham, N.C., public school system. Stephen received his undergraduate degree in English from Framingham State University, and an independent, alternative Masters in Education.
Matt Seats is a course director and lead instructor at The National Center for Outdoor & Adventure Education‘s (NCOAE). He received an Associate of Arts degree in outdoor education and leadership from Central Wyoming College, and a Bachelor of Arts degree in Adventure Education and Wilderness Leadership from Prescott College. Matt is a Wilderness EMT, Wilderness First Responder, American Heart Association CPR/AED Instructor, Leave No Trace Master Educator, an ACCT-F1 challenge course facilitator, and is AIARE Avalanche I certified.
TALK TO US
Have any further questions about our courses, what you’ll learn, or what else to expect? Contact us, we’re here to help!
Leave a comment