

Planning Backcountry Adventures in an Era of Extremes: 4 Essential Tips
WeatherFlash floods. Drought. Heat domes. Triple-digit heat indexes. Fire clouds. Those aren’t predictions from some distant climate scenario, they’re terms pulled from today’s headlines, actively transforming how we approach wilderness adventures and outdoor expeditions.
Some of these news stories hit close to home for anyone embarking on outdoor adventure programs or remote excursions. In late August of this year, a catastrophic flash flood triggered by a glacial collapse swept through a mountainous region of Nepal popular with trekkers, killing hundreds and leaving thousands missing.
Days later, a violent thunderstorm sent floodwaters roaring through Bright Angel Canyon in Grand Canyon National Park, killing two hikers, destroying footbridges, and forcing evacuations, underscoring why backcountry safety and wilderness medicine are more critical than ever.
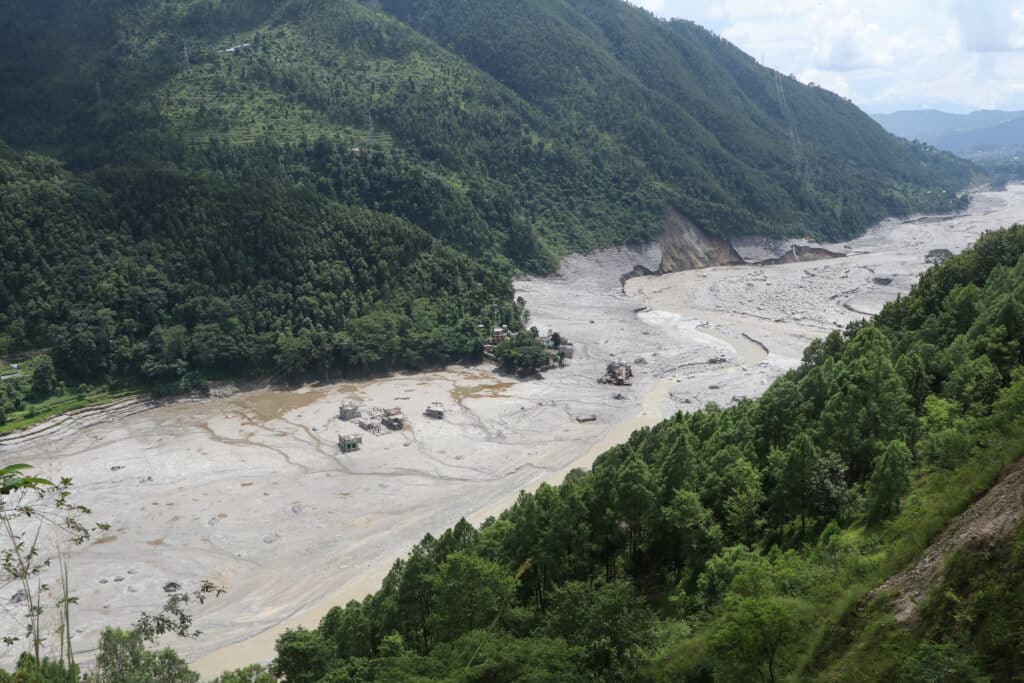
Nature has always challenged, and sometimes punished, those daring enough to explore remote backcountry destinations. But rapidly changing atmospheric conditions have raised the stakes, even in more hospitable environments. Whether organizing guided wilderness programs or setting out for an afternoon hike, proper preparation and solid outdoor skills are more critical than ever. It means looking beyond historical norms and planning for worst-case weather shifts.
In the outdoor education and human-powered recreation industry, the playing field is constantly shifting, making it essential to continuously evaluate conditions before venturing into the backcountry.
Having recently returned from a month leading backcountry trips in New England and preparing for upcoming trips in the Southeast, I’ve experienced firsthand how adaptable outdoor enthusiasts must be; whether planning single-day outings or multi-day outdoor expeditions in remote areas.
I spend an enormous amount of time guiding adventure travel and wilderness trips in remote locations, building a deep catalog of where to go and when to avoid certain areas. But lately, even years of experience aren’t enough. I’m no longer planning around locations and calendar seasons alone. I am also having to account for potential wildfires, floods, droughts, extreme heat, and tornadoes turning up at unexpected times in unexpected places.
That started me thinking about everyday adventurers who venture into the backcountry without formal instruction or decades of experience. How can they build essential skills to prepare for unexpected hazards that weren’t an issue during past visits?
With that in mind, here are four tips to help you plan a safer, more rewarding trip when everything you knew about a destination’s environmental challenges may no longer apply.
Tip 1: Plan and prepare
“Plan ahead & prepare” is the first of the core Leave No Trace principles (LNT principles), and it used to mean picking a spot, coordinating dates with companions, and heading out. Not anymore! In today’s shifting climate, proper trip preparation requires applying careful observation to monitor conditions and gather local beta (the latest firsthand information about trails, water, weather, and hazards) long before putting feet on the ground. Are conditions ripe for a forest fire? Will there be water in the rivers and lakes? Is there potential for heavy weather, tropical storms, or flash flooding?
Last year, local rivers I frequent hit all-time-high water levels, making paddling hazardous and damaging surrounding trails. Today, lake levels are strikingly low, and rivers look more like cobbled pathways than waterways. An excursion downriver or a canoe camping trip isn’t happening anytime soon. While historical data was once reliable, today’s travel requires reaching out directly to outfitters and local contacts to verify live conditions before finalizing your plans.
Pro Tip: Consider travel insurance. If your plans include a flight, hotel, and car rental, travel insurance can make it less costly to cancel if nature throws you a curve ball. Travel insurance runs roughly 4 to 8 percent of your trip costs, flights, and hotel and sometimes includes some medical coverage. For $1,000 dollars of coverage, you pay around $40.
I recently spoke with someone who had to cancel trip plans due to regional wildfires. Without trip insurance, they’re now struggling to recover non-refundable expenses—a common risk when planning unguided trips.
Tip 2: Evaluate / reevaluate when and where to travel
Look closely at the regions you plan to explore and research real-time backcountry conditions right up until departure. Evaluate and reevaluate where and when to travel based on current environmental realities. Never assume last season’s weather patterns or last month’s trail conditions still apply. Wildfires, sudden drought, and severe atmospheric shifts can quickly change where it makes sense to launch backcountry trips.
Monitor Active Fires and Air Quality
Wildfires can impact your trip even when flames are miles from your route. Dense smoke creates hazardous air quality, while active fires force trail and road closures that can compromise safety during backcountry excursions. Before embarking on remote travel, take a few minutes to evaluate real-time conditions and pack accordingly:
- Use tracking tools like InciWeb or Watch Duty to access real-time wildfire updates and containment data before you leave.
- Look at air quality forecasts on AirNow to ensure your destination is safe from heavy smoke.
- Check local ranger stations or land manager websites for the latest trail and road closures just before arrival.
- Pack N95 masks.
Consider Local Flood Risks
With little warning, severe flooding can turn a familiar trail, campsite, or river crossing into a hazard. Even under clear skies, upstream rainfall miles away can put backcountry travelers at risk. Before embarking on wilderness trips, understand where flash floods occur, watch changing water levels, and establish an emergency plan for getting to safety.
Monitor Weather Closely
- Check daily forecasts and severe-weather apps for upstream rainfall warnings before and during your trip.
- Identify local escape routes and higher ground options before setting up camp.
Pack Waterproof Gear
- Store sleeping bags and spare clothing inside heavy-duty dry bags or plastic trash can liners.
- Use a ground tarp cut slightly smaller than your tent floor, so it does not trap and pool water under the tent.
Choose High Ground
- Pitch your tent at least 100 yards away from rivers, streams, and low-lying valleys.
- Avoid natural drainage channels, dry riverbeds, and depressions where water pools.
Know When to Flee
- Move to high ground immediately if you notice even a slight or sudden rise in local water levels.
- Never attempt to walk, swim, or drive through fast-moving flood waters.
Preparing for Drought and Dry Conditions
Prolonged dry weather can change much more than the scenery. Water sources may disappear, fire danger can soar, and routine backcountry activities—from campsite selection to meal preparation—require elevated care. Before launching multi-day outings, evaluate how arid conditions impact your route and adjust your supplies accordingly.
Check Fire Restrictions
- Obey local bans: Always check official local or park fire bans before leaving.
- Bring a stove: Pack a portable propane or gas camp stove instead of relying on a campfire.
- Clear the area: If fires are allowed, clear all twigs, dry leaves, and dirt from around the fire ring.
Pack Extra Water
- Haul extra supply: Bring more water than you think you’ll need for drinking and cleaning.
- Confirm sources: Do not trust natural streams or pumps to be running or safe during a drought.
- Use multiple jugs: Split water into smaller containers so a single leak does not exhaust your supply.
Choose Safe Campsites
- Watch the brush: Avoid setting up your tent over dry grass, pine needles, or thick brush that can catch fire easily.
- Park carefully: Do not park hot vehicle exhaust pipes over tall, dry grass.
- Clear your space: Clear any flammable debris from the ground around your tent.
Adjust Meals and Hygiene
- Plan no-cook food: Bring foods that need zero water or cooking.
- Save wash water: Use wet wipes for cleaning, or wash dishes using a tiny trickle of water in a small tub.
- Store trash tight: Keep all trash sealed up so wildlife does not look for scarce water or food in your camp.
Tip 3: Learn to read conditions during your trip
I hear story after story of people who bailed on a trip due to a threatening forecast, only to discover later that the bad weather lasted only an hour or never materialized at all. Others get caught by sudden storms they didn’t see coming. Digital forecasts and weather apps are valuable tools, but they aren’t infallible, and in remote areas, cell signal disappears entirely.
Weather awareness requires more than trusting seasonal patterns or checking an app before departure. Developing core outdoor skills means learning to read the sky and your immediate surroundings for environmental shifts. The more field observation tools you have in your forecasting toolbox, the better equipped you’ll be to adapt your route decisions or head to safety when conditions change.
Reading the Sky and Environment
Long before digital weather apps, backcountry travelers relied on natural indicators to predict atmospheric changes. Developing these observational skills gives you time to prepare, alter course, or seek shelter during unexpected storms:
- Cumulonimbus clouds: Look for dark, tall anvil-shaped clouds that signal heavy rain, lightning, or tornadoes.
- Red sky in the east or west: Recall the adage: “Red sky at night, a sailor’s delight. Red sky in the morning, sailors take warning.” In the middle latitudes, weather systems generally move from west to east. A deeply red sky indicates a high-pressure system, which traps dust, salt, and dry aerosols close to the ground, causing the sky to turn red. When that high-pressure system is west of you, it’s moving toward you, bringing fair weather. When it’s east of you, a low-pressure system is likely headed your way, potentially bringing wetter, stormy weather.
- Haloes: Notice rings around the sun or moon, which show upper-atmosphere moisture and incoming precipitation. Recall the adage: “A ring around the sun or moon means rain or snow is coming soon.”
- Sudden shifts: Pay attention to rapid temperature drops, abrupt changes in wind speed or direction, and quickly darkening skies, all of which can signal an approaching front or thunderstorm. Heavy plant smells, brought on by rising humidity, can also be a sign of unstable atmospheric conditions.
Using Safety Rules and Alerts
Reading the sky can tell you a lot, but you shouldn’t rely on your own observations alone. Established weather-safety rules and official alerts can help you recognize when conditions are becoming dangerous and, more importantly, when it’s time to act:
- Thunder: Current U.S. lightning-safety guidance generally emphasizes, “When thunder roars, go indoors.” (This guidance is stricter than the 30/30 rule: If you hear thunder within 30 seconds of seeing a lightning flash, the lightning is closer than six miles, so seek safe shelter immediately.)
- Lightning safety: If you hear thunder, seek a substantial building or hard-topped vehicle immediately. If no safe shelter is available, remember that a tent will not protect you from lightning. Get off exposed or elevated terrain; stay away from water, isolated trees, and conductive objects; and spread out if you’re traveling with a group, so a single lightning strike is less likely to injure everyone in your party. In a forest, lower terrain among shorter trees is preferable to being near an isolated tall tree, but also remain aware of any flooding risks that may be elevated by moving to lower terrain.
- Watch versus warning: A watch means severe weather is possible (stay alert); a warning means severe weather is happening or imminent (take action).
- Electronic backup: Keep emergency alerts enabled on your phone and carry a portable, battery-powered weather radio as a backup for when cell service is unavailable.
Tip 4: Be flexible and beware of “summit fever”
“Summit fever” is a term used to describe a dangerous mental state in which a person becomes so obsessed with reaching the top of a mountain that the climber ignores clear warning signs like bad weather, severe tiredness, or other dangers. In other words, the climber has a severe case of tunnel vision that prevents rational thinking.
To avoid becoming a victim of summit fever, commit to flexibility as you plan your trip and maintain that commitment over the entire trip. Before you leave, be open to changing your destination, route, schedule, or even the dates of your trip if conditions warrant it. Once you’re underway, keep reassessing the weather, trail conditions, water availability, fire activity, and other potential hazards.
Turning around, taking a different route, or calling a trip short isn’t a failure. It’s just good decision-making. The goal isn’t to stick to the plan at all costs; it’s to adapt the plan as conditions change so everyone gets home safely.
Pro Tip: Develop contingency plans. The best way to remain flexible is returning to Tip 1 and creating backup itineraries. Select alternate dates, route options, or activities, and pack accordingly. A solid backup plan can mean the difference between an awesome adventure and sitting at home recovering from an avoidable emergency.
Extreme conditions increase inherent risks, but proactive habits allow you to mitigate hazards effectively. Researching destinations, tracking weather, observing nature, and staying adaptable test your planning capabilities, highlighting where your knowledge is strong and where you need further practice.
The backcountry will always be unpredictable. You cannot control severe weather, wildfires, or drought, but you control your preparation, environmental awareness, and willingness to pivot.
Ready to build confidence and elevate your backcountry preparedness? Explore NCOAE’s courses and certifications to master real-world risk management, or contact our team to plan a custom trip. Let’s get you prepared for your next journey!
Frequently Asked Questions
How do I verify real-time weather and fire hazards before starting a wilderness trip?
To gather accurate conditions beyond standard weather apps, contact local ranger stations or outfitters directly within 24 to 48 hours of your departure to get firsthand “local beta.”
Fire & Air Quality Tracking: Use real-time monitoring tools like InciWeb or Watch Duty for active fire containment updates, and check AirNow for regional smoke and air quality forecasts.
Trail & Road Closures: Review official land manager websites or call local forestry offices to confirm trail washouts, road closures, or temporary fire bans.
Upstream Flood Hazards: Check radar apps for heavy rainfall upstream, as severe flash floods can travel miles downstream under locally clear skies.
What steps should I take to minimize flash flood risks at my campsite?
Pitch your tent on high ground; at least 100 yards away from rivers, streams, dry riverbeds, and low-lying drainage channels where water naturally pools.
Map Escape Routes: Identify higher ground and clear exit paths before pitching your shelter.
Protect Essential Gear: Store sleeping bags and extra clothing inside heavy-duty dry bags or waterproof liners to keep them dry during heavy rain.
Monitor Water Levels: Move to higher ground immediately if you notice sudden water discoloration or rising stream levels, and never attempt to walk, swim, or drive through fast-moving floodwaters.
What is “summit fever,” and how can I prevent it from compromising trip safety?
Summit fever is an obsessive state of tunnel vision where an adventurer becomes so focused on reaching a goal, such as a mountain peak or campsite, that they ignore obvious dangers like severe weather, physical exhaustion, or incoming storms.
Establish Turn-Around Times: Set a strict, non-negotiable turn-around time prior to starting your trek, regardless of how close you are to the destination.
Build Contingency Plans: Develop alternate routes, backup dates, or secondary objectives before leaving home so pivoting feels like a planned adjustment rather than a failure.
Prioritize Safe Returns: Remember that turning back, rerouting, or ending a trip early is smart risk management designed to ensure everyone returns home safely.
– – – – – – –
About the Author: Stephen Mullaney is the Director of School Partnerships and Staff Development at The National Center for Outdoor & Adventure Education (NCOAE).
Catching the Best While Dodging the Worst: Weather Monitoring for Outdoor Education and Adventure Programming
Risk ManagementMaps cover the floor like carpet. I’m perched on the edge of a couch in the back room of a surf shop, watching the Weather Channel. I jot down timing, wind speed and direction, barometric pressure, tides, and air and water temps. Then I study the maps and place pebbles where I might score big winter swells.
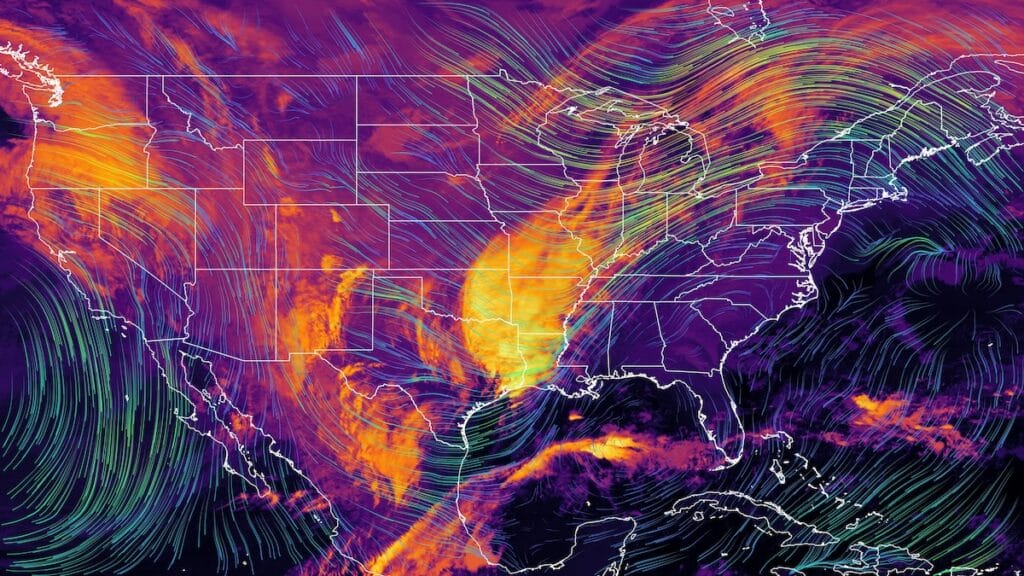
My objective is simple: maximize fun while reducing risk.
Thoughtful weather monitoring plays a central role in that. It helps identify, analyze, and reduce risks tied to changing conditions by combining real-time data, historical patterns, and forecast trends. For organizations like The National Center for Outdoor & Adventure Education (NCOAE), it supports preparation, protects operations, and, most importantly, keeps participants safe.
Over the years at NCOAE, I’ve thoughtfully pushed myself and others with similar skills right to the edge of our comfort zones. From that experience, I built a three-tier framework to assess and reduce weather-related risk. This post breaks it down.
The Three-Tier Framework
Before heading out, I run every trip through a simple framework that keeps my decisions grounded and intentional. It helps me stay focused on what matters most: making the most of the experience while staying prepared for what could go wrong.
Here’s the framework:
(more…)TALK TO US
Have any further questions about our courses, what you’ll learn, or what else to expect? Contact us, we’re here to help!