Basic Versus Advanced Airway Management: Keeping It Simple (at First)
August 29, 2025
In the backcountry, where hospitals are likely many miles away and help isn’t “just around the corner,” airway management becomes a high-stakes priority. After all, the statistics are against the patient. Without an open, clear airway, that patient has a zero percent chance of survival.
Whether it’s a fall, an allergic reaction, choking, or a drowning, keeping the airway open is a life and death proposition. Wilderness medicine demands quick thinking, decisive action, and a solid grasp of airway basics, because you’re the first, and perhaps only, responder.
This post brings you up to speed on airway management basics with a focus of first employing the simplest and least invasive methods for opening the airway.
What Is the Airway?
The airway is a tunnel connecting the mouth and nose to the lungs. It ends at the alveoli, which are the tiny air sacs in the lungs that facilitate the exchange of gases, primarily oxygen and carbon dioxide. As long as this tunnel remains open, a person can breathe. If the tunnel collapses or is blocked at any point, breathing ceases or is restricted to some degree.
Healthy humans maintain an open airway by holding their head upright, swallowing their secretions, controlling their tongue, coughing, spitting, and otherwise emptying the tunnel of everything but air. Whenever the airway collapses due to illness or injury or is blocked by solids or liquids “going down the wrong pipe” and getting stuck there, medical intervention is required. That’s where you, the emergency medical technician (EMT), or someone else who’s received the relevant training, must step in to clear the airway.
The interventions used by the EMT can be divided into Basic (simpler and less invasive) and Advanced (more complex and invasive).
Basic Methods for Clearing the Airway
When someone can’t breathe or is struggling to do so, you should use the simplest, least intrusive method necessary to open the airway. Basic methods include the following:
- Abdominal Thrusts (Formerly Heimlich): If someone can’t breathe because they’re choking on something, and the person is conscious, apply abdominal thrusts to dislodge the object that’s blocking the airway. To perform the maneuver, stand behind the person who is choking, make a fist with one hand, and place the thumb side just below their ribcage. Grasp your fist with your other hand and thrust inward and upward sharply five times until the object is dislodged or the person becomes unconscious.
- Head-Tilt, Chin Lift: With the patient lying on their back, tilt the head back and lift the chin to move the tongue away from the airway. (Use for unconscious patients without suspected spinal injury.)
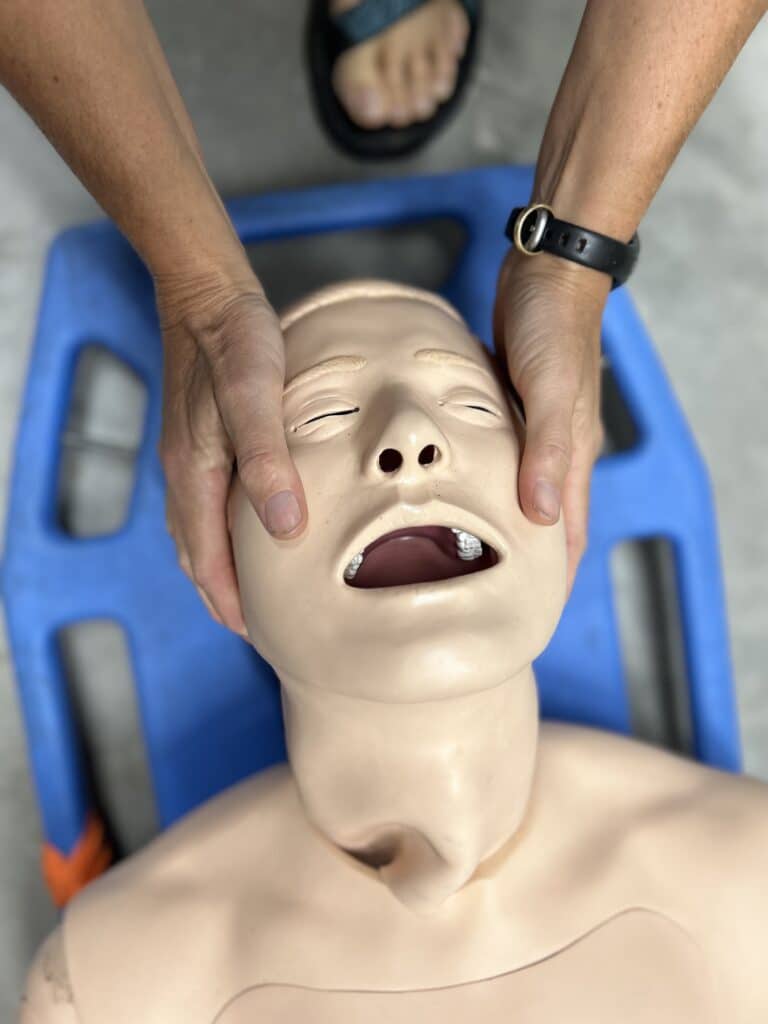
- Jaw-Thrust Maneuver: With the patient lying on their back, lift the jaw forward without moving the neck, helping to open the airway while protecting the spine. (Use for unconscious patients with possible spinal injury.)
- Finger sweep: If the patient is unconscious and not breathing, and you can see an object obstructing the airway, perform a finger sweep to remove the object. Start by using the Head-Tilt, Chin-Lift or the Jaw Thrust Maneuver to gain access to the airway. Use your index finger (for an adult patient) or pinky finger (for an infant or young child). Insert your finger along the inside of the cheek and scoop in a hooking motion along the curve of the mouth toward the center. Ideally, you want to get your finger behind the object to scoop it out. Avoid doing anything to push the object deeper.
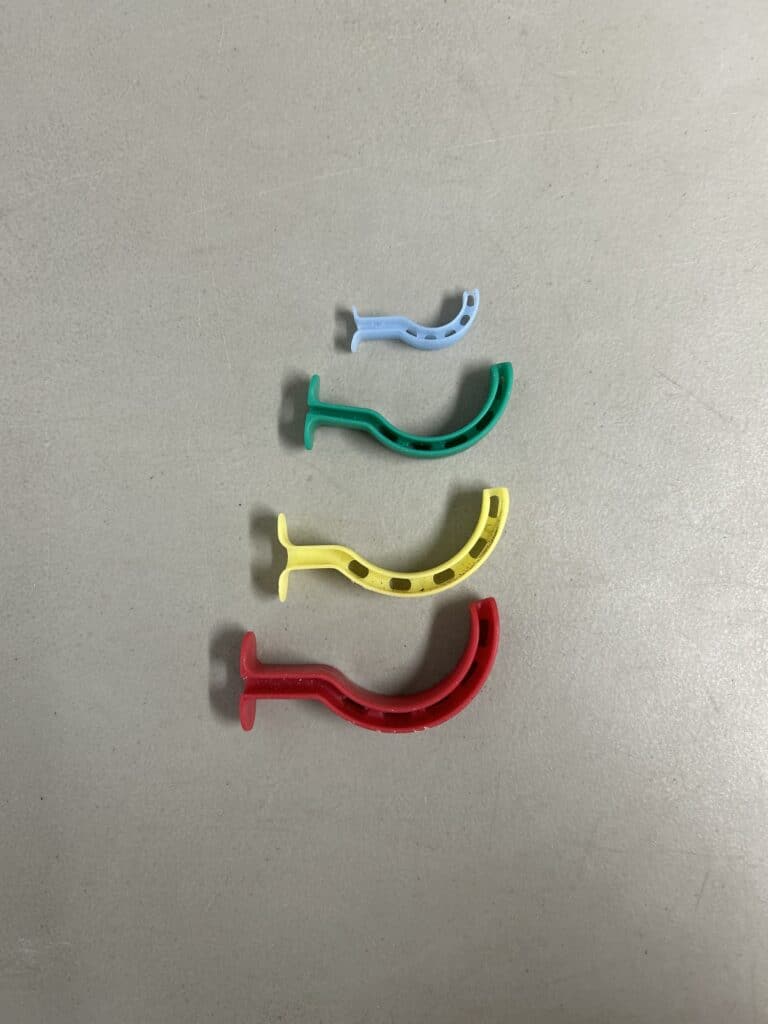
- Oropharyngeal Airway (OPA): OPA is an adjunct device that moves the tongue off the opening to the trachea (windpipe). It comes in several different sizes, as shown below. You insert the device with the tip pointed toward the roof of the mouth and then rotate it 180 degrees when it reaches the base of the tongue. You can also insert it sideways with the tip toward the cheek and then rotate it 90 degrees down into the trachea.
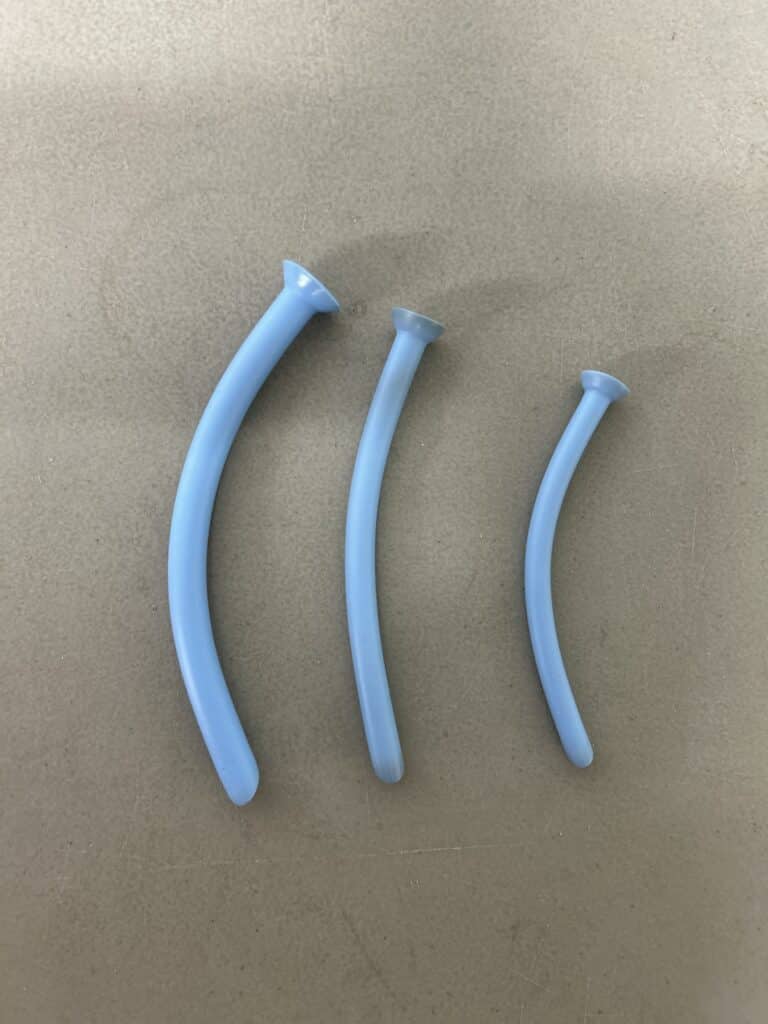
- Nasopharyngeal Airway: NPA is an adjunct device that enhances the ability for air to pass through the nasal passage. It comes in several different sizes, as shown below. You lubricate the narrow end of the tube and insert it into one of the patient’s nostrils, gently pushing it down along the floor of the nasopharynx.
- Recovery Position: If the patient is unconscious but breathing, lay the patient on their side to keep the airway open and allow fluids to drain.

Advanced Methods for Opening the Airway
If basic methods do not or will not work in a given situation, more advanced methods may be required to open a person’s airway. Advanced methods, which are more invasive, include the following:
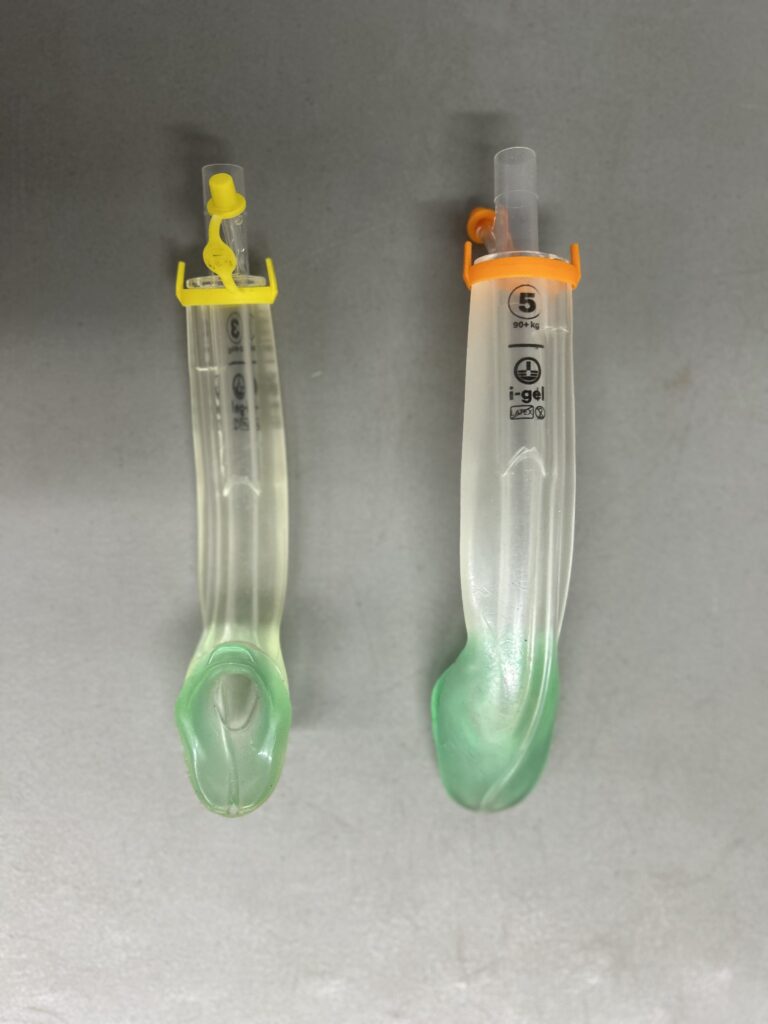
- Supraglottic Airways (SGAs): Devices such as the Igel and King, also known as “blind insertion airway devices,” provide a fast, effective way to maintain an open airway above the vocal cords without needing advanced intubation skills. The procedure for inserting the device varies depending on the type. The image below shows an Igel device positioned as if it were to be inserted into the airway.
- Surgical cricothyrotomy: Paramedics, with EMT assistance, in most jurisdictions are permitted to perform a surgical cricothyrotomy (cutting into the trachea to place a tube), but this done only if less invasive options are not working or likely to work.
Using the Simplest, Least Invasive Option First
The overall approach to airway management is to employ the simplest, least invasive options first. Cutting into the trachea to insert a breathing tube would be ridiculous if a simple Head-Tilt, Chin-Lift would get the patient breathing again.
When is it best for the EMT to “keep it simple” and stay with the basics? Here’s what you need to know:
- When it’s working. When the EMT is successfully ventilating (putting air in the lungs) and oxygenating (ensuring that air has the appropriate percent of oxygen), progressing to more advanced techniques is unnecessary and risky.
- When more important interventions, such as defibrillation (shocking the heart) or bleeding control, are a higher priority. In such cases, progressing to more advanced airway management techniques is inappropriate.
- When your people power is limited. Advanced airway management generally requires a team to ensure it is done properly while not neglecting other aspects of patient care.
Airway management is a foundational skill for EMTs; in fact, it may be the most important skill. However, familiarity with the available tools and techniques is not enough. You also need to be able to recognize the conditions in which each tool/technique is most appropriate. When it comes to airway management, more is not necessarily better. The simplest, least intrusive approach is best. Start with that and progress to more advanced methods only when necessary.
For in-depth training in wilderness and emergency medicine that includes airway management, enroll in one of our wilderness medicine or EMT courses. Check out our emergency medicine course catalog for options.
– – – – – – –
About the Author: Todd Mullenix is the Director of Wilderness Medicine Education at The National Center for Outdoor & Adventure Education in Wilmington, North Carolina.
Disclaimer:The information in this National Center for Outdoor & Adventure Education (NCOAE) blog post about airway management is provided for general informational purposes only and may not reflect current medical thinking or practices. No information contained in this post should be construed as medical advice from the staff at NCOAE. No reader of this post should act or refrain from acting on the basis of any information included in, or accessible through, this post without seeking the appropriate medical advice on the particular facts and circumstances at issue from a licensed medical professional in the reader’s state, country or other appropriate licensing jurisdiction.
TALK TO US
Have any further questions about our courses, what you’ll learn, or what else to expect? Contact us, we’re here to help!
Leave a comment